For many, the world's finest wreck
This is one of the most mythical wrecks for scuba diving enthusiasts. And rightly so - it remains virtually intact, with its holds containing one of the greatest "museums" of World War II. Ammunition, torpedoes, jeeps, BSA and Norton motorcycles, tyres, tanks, locomotives, anti-aircraft guns and countless other Allied military supplies remain preserved as if frozen in time - though the sea, Egypt's magnificent Red Sea, has left its mark.
A short but intense history
The Thistlegorm was built in Sunderland (England) in 1940 at the Joseph Thompson and Sunderland Sons shipyard. Measuring 126.5 metres in length with a displacement of 4,898 tonnes, she was destined for war service from her launch on 9th April 1940 due to Europe's escalating conflict.

Captain Ellis commanded the vessel, completing just four voyages aboard Thistlegorm. After returning from her third journey (collecting sugar and rum in the West Indies), she was loaded with military supplies to support General Montgomery's Allied offensive in North Africa against the "Desert Fox", Field Marshal Rommel, who was then inflicting heavy losses on Allied forces.
With the Mediterranean under strict German air surveillance, the safest route involved circumnavigating Africa via the Cape of Good Hope to approach from the Red Sea. As they entered the Gulf of Suez in late September, the ship received orders to anchor and await further instructions.
Navigating the Suez Canal proved impossible - enemy aircraft dominated the skies, while two collided ships blocked the entrance. This forced Thistlegorm to wait two weeks. Though Captain Ellis remained unconcerned (German planes rarely ventured so far south), German intelligence had intercepted reports of a British convoy - potentially including the Queen Mary - transporting troops to North Africa.
On the night of 5th October 1941, two German Heinkel bombers departed Crete under orders to "sink and destroy" this convoy. Under a brilliantly clear full moon, they scoured the area fruitlessly before spotting the anchored British ship during their return flight. With nearly empty fuel tanks, they turned back and delivered two precision bombs - one detonating the ammunition stores with catastrophic effect at 1:30am on 6th October 1941. Nine of the 49 crew perished.
The ship sank almost immediately, with survivors abandoning ship in lifeboats before being rescued by HMS Carlisle and repatriated via Suez.
Diving the Thistlegorm
Today, the 9,000-ton wreck lies split in two on a sandy seabed at 30 metres depth. She maintains a navigational position, bow pointing north as if still awaiting passage through the Suez Canal.
Located approximately five miles northeast of Shag Rock (the southern tip of Sha'ab Ali reef near the canal's southern entrance), her exact coordinates are 27°42'00"N 34°05'00"E. This open-water site lacks reef protection from winds and currents, requiring optimal sea conditions for safe anchoring and diving.

The area typically experiences strong northerly currents that stir bottom sediments, reducing visibility. When conditions permit, virtually all dive boats converge here - often over twenty vessels arrive daily during peak seasons.
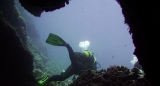
Divers must always descend/ascend via the anchor line. Dive guides typically secure it to the superstructure (12-18 metres depth). Surfacing independently proves extremely dangerous given heavy boat traffic, while the average dive depth usually necessitates decompression stops. Gloves and powerful torches are essential for safely exploring the interior treasures.
The first dive
While not exceptionally challenging, interior exploration requires good buoyancy control and experience due to numerous sharp edges. The wreck's size and fascinating contents demand multiple dives. We recommend dedicating one dive to the stern section (lying on its starboard side) to admire the massive propeller, two anti-aircraft guns, crew quarters and third hold.

This bomb-impact zone reveals tangled wreckage containing abundant ammunition, Bren gun carriers, rifles, bombs etc. At 30 metres near the most damaged section, one of two locomotives (catapulted 30 metres from the starboard side during the explosion) can be seen. Always ascend via the anchor line.
The second dive
This explores the bow section at 18 metres depth, featuring the starboard anchor embedded 30 metres ahead and the port anchor still hanging. This area offers the wreck's most spectacular sights.
On deck you'll find rail wagons, tankers and massive torpedoes. After exploring bridge compartments, descend into the first of three holds - here dozens of perfectly stacked, recognisable motorcycles await after 60 years underwater.
Proceeding to the second hold reveals trucks, jeeps, motorbikes, hundreds of tyres and equipment like boots and uniforms. Peering inside vehicles requires cautious movement to avoid disturbing silt deposits.

All too soon, you'll need to ascend via the anchor line.
After reliving this tragic historical chapter during your decompression stop, you'll inevitably glance back at this magnificent wreck, already planning your return.